Corded Mini-Blind Motors - How To Remove Your Mini-Blind From a Window
 You will need to remove the mini-blind from the window in order to use some 5 minute epoxy to prevent the cord latching feature from activating.
This allows the motor to provide a continuous unimpeded lift, until it reaches the travel limit (set by you).
This page will show you how we removed ours, but please keep in mind that you will probably have a slightly different mini-blind design, so please examine your unit carefully to see what might be a distinctive difference.
Please note that our remotes can also control our roller shade motors, window/skylight openers, CurtainCloser™ drapery kits, and our ShadeSlider™ skylight shades.
Removing the Valance
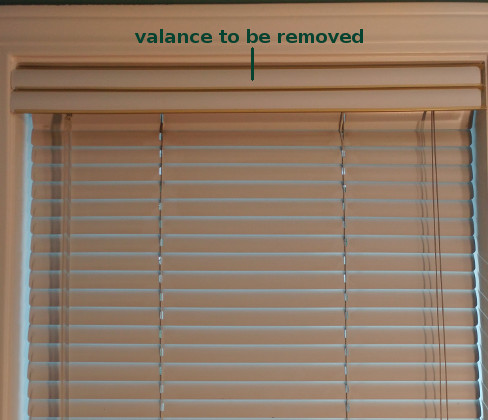
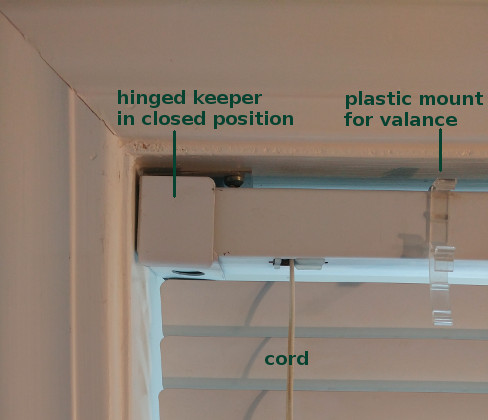
The mini-blinds may have a slatted valance (pictured below) that needs to be removed, allowing access to the keeper hinges (pictured below) that hold the mini-blind in place. There are keepers on either side of the mini-blind, and two plastic valance clips.
Our slatted blinds were over 25 years old, and over that time the plastic clips can become quite brittle, so please be careful how you remove the valance from the clips (don't stress the plastic clips too much; just enough to release them).


The second picture above shows a close-up of the exposed mini-blind header (with keeper still locked in place) after the valance is removed. The next step is to open the hinged keepers so that you can gently lift the mini-blind away from the window.
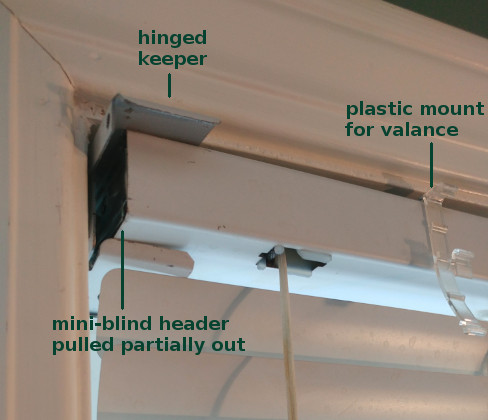
 This picture shows the keeper in the open position (it hinges up), with the mini-blind header pulled partially away from the window.
When you open both hinged keepers, you should be able to just lift the mini-blind out of its mount and place it on a bench or table somewhere.
We should mention that mini-blinds are somewhat delicate, with a lot of moving parts, so please be careful when you move it. We found it best to move it in the fully retracted position.
You can defeat the cord latching mechanism by applying 5 minute epoxy to prevent the cord latching mechanism from engaging.
This allows the motor to run continuously until it reaches a travel limit (or you press the STOP button).
This topic will be covered in detail on the next page: defeating the mini-blind cord latching mechanism.
You can purchase the mini-blind motors, along with motors for blinds and window openers, and our control products in our DIY online automation store.
We sincerely hope you enjoy our advanced technology products; if you have any questions, please contact us at any time!
Adrian Biffen
Senior Partner
NodeSwitch™ Controls
Articles in This Mini-Blind Series
1. Introduction to Mini-Blind Motors
2. Removing the Mini-Blind from a Window (You are here)
3. Defeating the Mini-blind Cord Latching Mechanism
4. P Series Motors: Channel Assignments & Travel Limits
Other Reference Articles
Controlling TV and blind motors with Broadlink hub and Alexa
